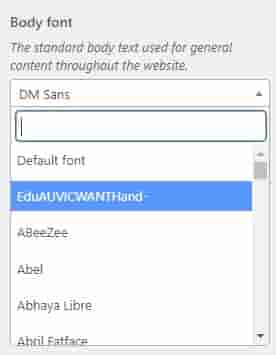
These settings allow you to customize the fonts used throughout your site.
Body Font
This option allows you to set the font for the main body text of your site.
Header Font
This option allows you to set the font for the header area of your site.
H1-H6 Fonts
This option allows you to set the fonts for the heading levels (H1 to H6) of your site.
Each font option has the following settings:
Understanding rem Units
What is rem?
rem stands for “root em” and is a relative unit of measurement in CSS. It is based on the root element (html) font size. By default, 1 rem is equal to the font size of the root element, which is usually 16 pixels in most browsers. Using rem units allows for scalable and responsive typography, as changing the root font size will proportionally change the sizes of all elements using rem units.
For example:
- If the root font size is 16px, then 1rem = 16px.
- If you set an element’s font size to 1.5rem, it will be 1.5 times the root font size (1.5 * 16px = 24px).
Installing custom fonts
1. Obtain the Custom Font Files
Ensure you have the custom font files you wish to use. Common font file formats include:
.woff.woff2.ttf.eot.svg
2. Upload Font Files to assets/fonts Folder
- Access Your Theme Directory:
- Connect to your WordPress site via FTP or use the file manager provided by your hosting service.
- Navigate to the Lito theme directory, usually found at
wp-content/themes/lito.
- Create the
fontsFolder (if it doesn’t exist):- Within the
assetsdirectory, create a new folder namedfontsif it does not already exist:wp-content/themes/lito/assets/fonts/
- Within the
- Upload Font Files:
- Upload your custom font files to the
assets/fontsfolder.
- Upload your custom font files to the
- Check the font in the font selector:
- Your font should be available in the Font selector, at the very top, just below the “Default font” option:

- Your font should be available in the Font selector, at the very top, just below the “Default font” option:
